Why Your Pie Crust Isn’t Crunchy?
Some folks taste pie and wonder – why so soft, when it could snap between teeth? Crispness slips away more often than you’d guess.
Finding the right crispness in a pie shell seems easy – until it isn’t. A bit too tender? Wet base? Crunch completely missing? We’ve all faced that moment. Right when you expect crackle, you get mush instead.
Baking a super flaky pie shell? Not magic. Just tiny moves many miss. Real skill hides in details ignored too often.
Start with something clear, something you can use every day at home. Not theory. Real tools, real time, things already on your shelf. Forget what happens behind closed doors somewhere fancy. This is about now, here, where cooking really goes down.
Extreme Crunch Explained?
What needs repair becomes clear only once it has a name.
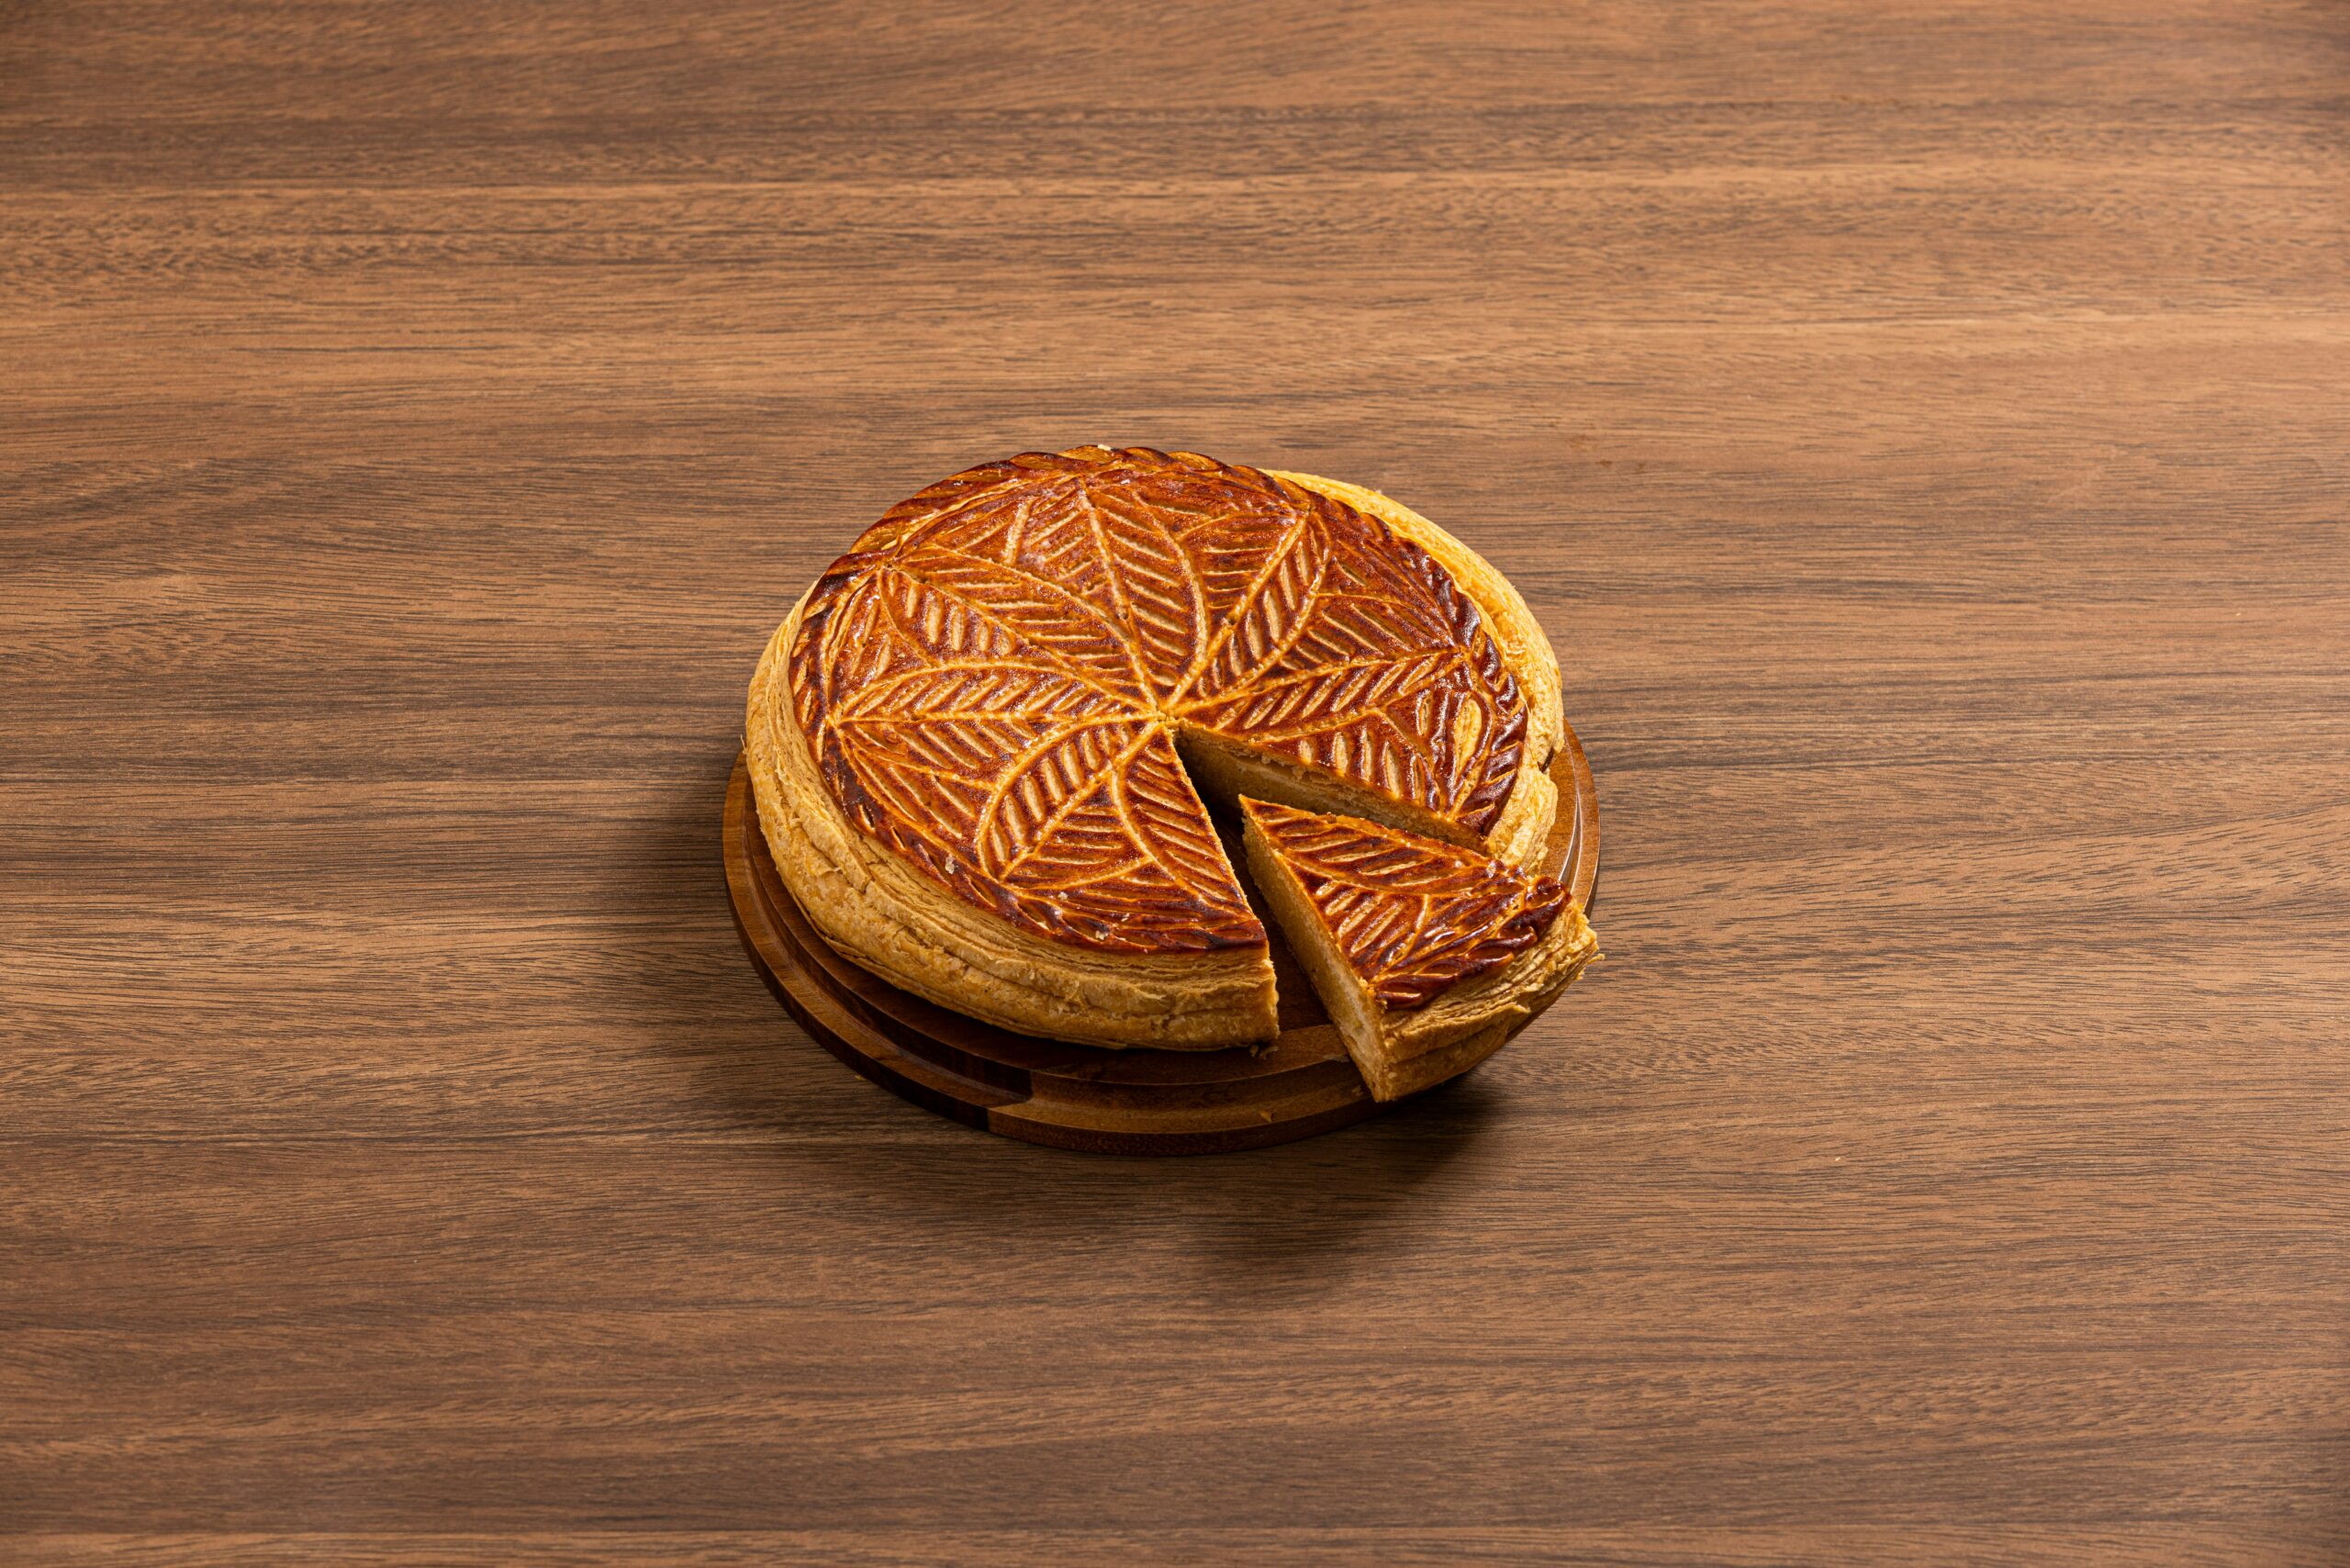
A truly crunchy pie crust should be:
Outside, a shade like sunlit honey meets a crunch that snaps clean. Crispness holds tight where warmth glows just beneath. A finish that stays sharp, never softens too soon
Light and flaky on the inside
Filling stays put, the crust keeps it all from turning into a mushy mess
Picture how it cracks cleanly the moment your knife presses down. Hitting that mark is what matters.
The Real Reason Pie Crusts Stay Crunchy
Truth is, getting that crisp depends on how much fat you have, whether the surface stays wet, plus what temperature it hits.
Fall short on just one, yet the crust takes a hit.
1. Cold Fat Is Actually Useful When Very Cold.
As heat hits, tiny vapors rise where cold fat melts. These little bursts leave gaps behind. Each gap becomes a soft layer. Flakiness happens because of such small escapes. What seems solid at first turns airy later on
Flaky layers
Crispy texture
That signature crunch
2. Dont Overwork the Dough
Right here is where things start going sideways for most folks.
Chewiness grows when flour meets motion – each press builds stretch. That spring comes alive because strands link up through effort instead of staying brittle.
Leave visible butter chunks
Embrace a slightly messy dough
Picture a coarse batter – that roughness brings more snap when you bite.
3. Chill the Dough Twice
Waiting quietly brings its reward in time.
Cold slows down spoilage. It also keeps textures firm
Firmness returns to the fatty tissue once more
Relaxes the gluten
Do this:
Wait a while once you’ve stirred everything together – thirty minutes should do. Cold helps it set just right
Rest it once more when the dough’s pressed into place
Fine, it takes extra minutes – yet that gap turns fine into fantastic.
The Hidden Trick Behind Perfect Pastry
Burnt edges? Try preheating the crust alone first. That quiet step keeps sogginess from sneaking in later.
Blind Baking Explained?
Baking the crust first happens while it’s still empty. This step goes ahead of pouring in any fillings.
Why It Works
It:
Removes excess moisture
A solid foundation forms when the mixture sets firmly. Crispness comes through even spreading. Structure holds best after cooling completely
Prevents that dreaded soggy texture
Quick steps:
Line crust with parchment paper
Bake blind with something heavy inside – pie weights work, though dried beans do just fine.
A quarter hour might be enough. Sometimes it takes five extra minutes. Watch until golden. Heat that long – no more, no less
Remove weights and bake a bit more
Simple Ways to Make Crunch Better
Fine texture not enough? Go louder with these picks
Adds shine
Creates a protective barrier
Enhances crispiness
A quiet crunch appears instead. That’s what happens.
Use Cornstarch or Semolina
Sprinkle flour across the surface first thing.
Bake it first, after slide the filling inside.
Lasts extra time before going soft. Holds crunch through hours that others lose fast
Temperature matters more than thought
Firm touch shapes dough more than gentle pressure ever could.
Fierce warmth pushes further than mild. A sharp rise carries more weight than a slow climb.
Ideal Baking Strategy:
A blaze hits around 400 degrees Fahrenheit – nearly 200 in Celsius – to start the process.
Heat hits hard right from the beginning, setting the pace without warning
Lower it just a bit more when required
Faster steam means a crispier crust when the oven runs hot. A flaky finish starts with intense warmth inside. Crust cracks best under strong heat early on.
Common Mistakes That Kill Crunch
Truth is, tiny errors mess up the feel. Not every slip shows, but each one changes how it looks.
Avoid These:
Warm dough: melts fat too early
Water in excess brings mushiness instead of firmness
Skipping blind baking: hello soggy base
Underbaking: pale crust = no crunch
A little extra time can make a big difference if the crust seems nearly there. Flavor shows up best when color deepens, along with crispness.
Real Life Moment Everyone Gets

That time I hurried a pie together for visitors – no resting, no pre-baking, yanked from the oven too soon.
Fine on the eyes. The flavor? Not so much.
Footsteps sink without echo here. Silence where there should be snap. A flat hush replaces crisp sound. Life leaks out through quiet.
This round, I stuck to each step just as written – doubled down on the chill time, skipped peeking while it baked.
What sets them apart? Like morning compared to midnight. Sharp texture, layers that break just right, a bite that leaves you content. That contrast changes everything.
Sure, talent matters – but often, it’s really about method.
How This Functions
Texture inside a pastry? That depends on how ingredients behave when mixed and baked, say experts at places such as King Arthur Baking Company. Findings from Serious Eats back this up. The way flour absorbs liquid matters – so does fat temperature.
A heavier hand with sugar often means edges brown deeply and stay crunchy. Inside, eggs build firmness yet leave a soft trace behind.
Even altitude shifts outcomes, since air pressure affects rise and spread. Each detail quietly shapes what happens when you take a bite
Layers form where fat settles
Moisture escapes when water turns to vapor, stopping things from getting mushy
Heat control (drives structure formation)
Firm outer layer?
This sticks above all
Use cold butter
Don’t overmix the dough
Pause. Take it slow – once won’t cut it. Again. A second freeze, just like that
Always blind bake for wet fillings
Start by using a hot oven right away
Your pie crust won’t stay dull if you stick with these moves. One small change at a time keeps it fresh. Try them often, then notice how things shift. Bland edges fade when effort shows up daily. Stay regular with this list, flavor wakes up. Repetition here means less predictability on the plate.
Ready to Take Your Pie Skills Up a Level?
Crust so crisp? That comes from doing things right, not fancy titles in the kitchen. What matters is using methods that deliver real results.
Most folks crave that crisp sound when their fork cuts through. When those fundamentals click, each pie turns into its own quiet victory.
Baking again soon? Pause first. Wonder whether that crust will crackle nicely – or fall flat without warning.
FQ:
1. What stops the base of a pie from turning mushy?
Bake the crust alone before adding filling. A thin layer of beaten egg works well to block sogginess. Sometimes a sprinkle of starch does too.
2. Is chilling dough really necessary?
Without question. Cold butter stays firm during mixing, which helps limit how much the flour absorbs moisture – so the dough holds its shape when baked. Gluten forms less this way, avoiding chewiness. That crisp result depends on it.
3. A golden hue usually means it’s done. Watch how it pulls away from the pan slightly. The bottom should sound hollow if tapped gently. Smell helps too – a nutty warmth often signals readiness. Time matters, yet every oven behaves differently.
A rich golden hue signals proper baking. If the surface stays light, it likely needs more time – crispness suffers when browning falls short.